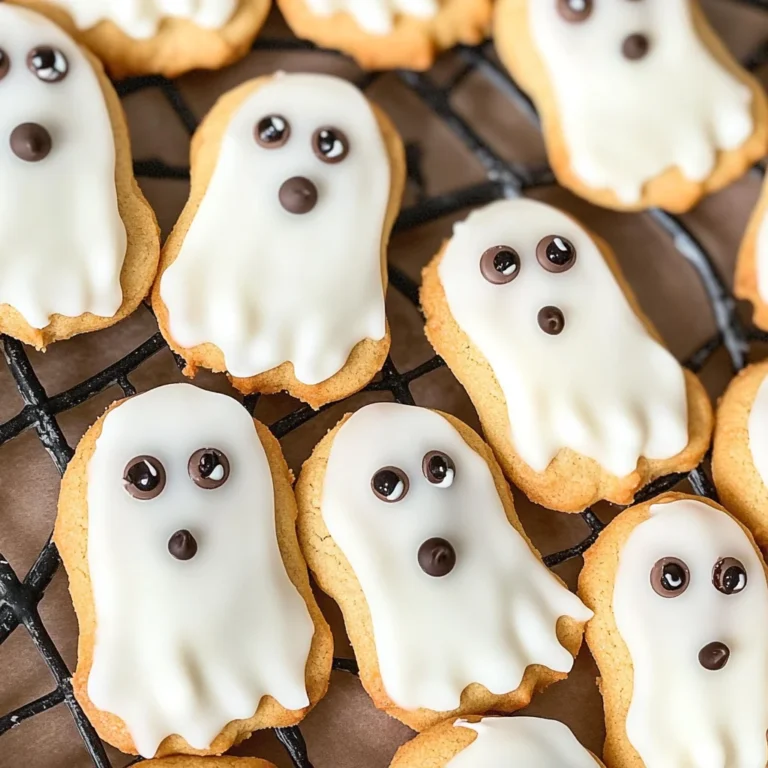
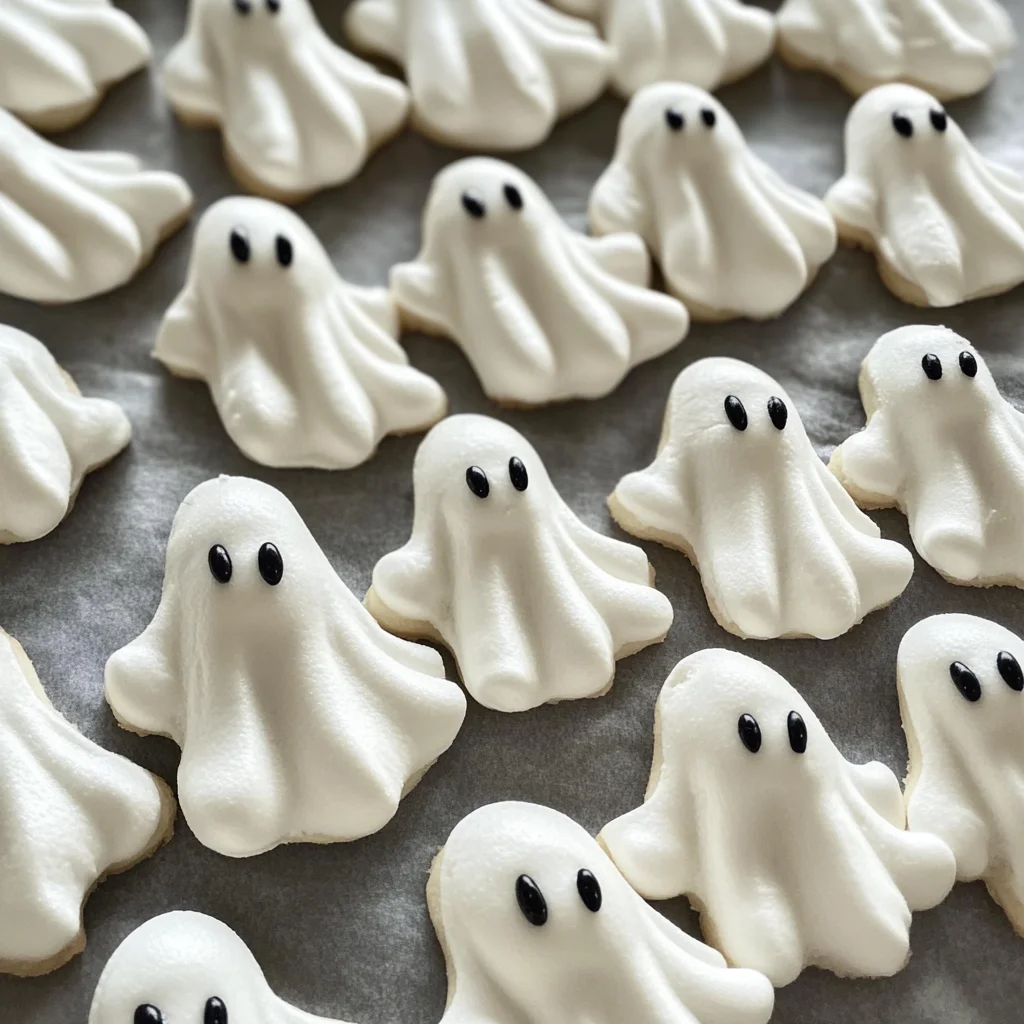
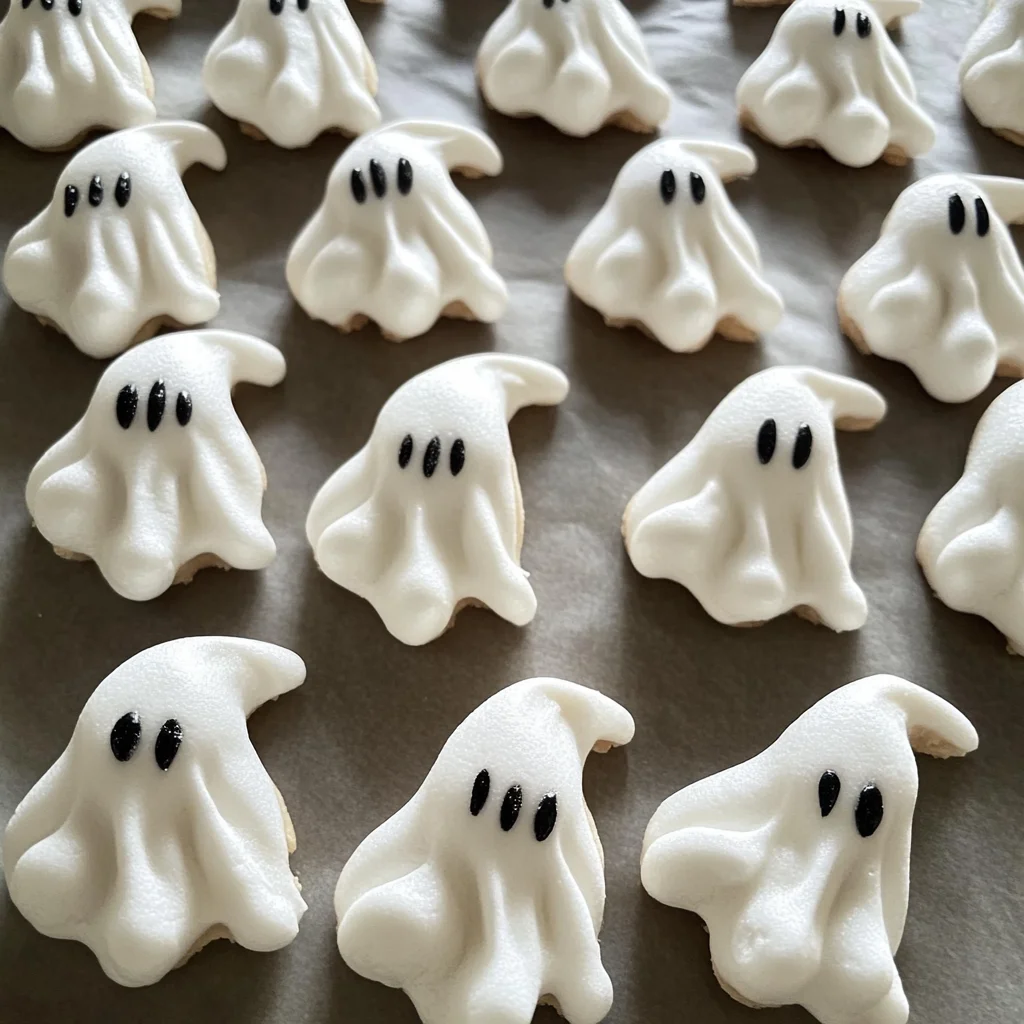
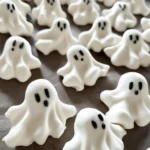
Ghost-Shaped Meringue Cookies
Ghost-Shaped Meringue Cookies are a delightful treat that adds a spooky touch to any occasion. These light and airy cookies are perfect for Halloween parties, school events, or just a fun baking day with the kids. Their unique ghostly shapes and sweet flavors make them an eye-catching dessert that everyone will love. Plus, they’re simple to make, using basic ingredients found in your kitchen.
Why You’ll Love This Recipe
- Easy to Make: With just a few simple ingredients and straightforward steps, these cookies are beginner-friendly.
- Perfect for Kids: The fun ghost shapes and decorating options make this recipe great for involving children in the kitchen.
- Versatile Treat: You can easily adapt the decoration to fit different themes or occasions beyond Halloween.
- Light & Sweet: These meringue cookies are airy and melt in your mouth, making them a delightful snack any time of year.
- Gorgeous Presentation: The whimsical appearance of these cookies is sure to impress guests and create a festive atmosphere.
Tools and Preparation
Before diving into the recipe, gather your tools. Having everything ready will make the process smoother and more enjoyable.
Essential Tools and Equipment
- Stand mixer or hand whisk
- Mixing bowl
- Parchment paper
- Baking sheets
- Black edible marker
Importance of Each Tool
- Stand mixer or hand whisk: Essential for achieving the stiff peaks needed for perfect meringue texture.
- Mixing bowl: A must-have for combining your ingredients effectively without mess.
- Parchment paper: Prevents sticking and makes it easy to lift your meringue cookies off the baking sheet.
Ingredients
For the Meringue
- 3 medium egg whites
- 170 g (¾ cup) sugar
- 1 teaspoon vanilla extract or 1 packet vanilla sugar
- ½ teaspoon vinegar or a squeeze of lemon juice
How to Make Ghost-Shaped Meringue Cookies
Step 1: Preheat the Oven
Set your oven to 95°C (200°F). This low temperature is crucial for drying out the meringues slowly without browning them.
Step 2: Beat Egg Whites
Using a stand mixer or hand whisk, beat the egg whites until firm peaks form. This process usually takes about 5-7 minutes on high speed.
Step 3: Add Sugar Gradually
Slowly add sugar, a little at a time, while continuing to beat. This helps dissolve the sugar completely into the egg whites for a smooth texture.
Step 4: Add Vanilla & Acid
Mix in vanilla extract and vinegar (or lemon juice). This step enhances flavor and helps stabilize the meringue.
Step 5: Beat Until Glossy
Keep whipping until the meringue is shiny, stiff, and smooth—no graininess when rubbed between fingers. This indicates that your meringue is ready for piping.
Step 6: Pipe Ghost Shapes
On two parchment-lined baking sheets, pipe small ghost shapes with peaks at the top. Use a piping bag for better control over shapes.
Step 7: Bake
Bake for 90–120 minutes until cookies lift easily off the parchment. They should feel dry to touch but still be light as air.
Step 8: Cool & Decorate
Let cookies cool completely. Once cooled, use a black edible marker to draw ghostly eyes and screaming mouths on each cookie.
Step 9: Serve & Enjoy
Watch the kids’ delight as they find these spooky, sweet treats! Perfect for sharing at gatherings or enjoying as a fun family snack.
How to Serve Ghost-Shaped Meringue Cookies
These delightful Ghost-Shaped Meringue Cookies are perfect for Halloween parties or spooky-themed gatherings. Here are some creative ways to serve them that will impress your guests.
Creative Serving Suggestions
- Ghostly Treat Bags: Place individual cookies in clear treat bags tied with orange ribbon for a fun and festive giveaway.
- Spooky Dessert Table: Arrange the cookies on a decorative platter alongside other Halloween treats like pumpkin-shaped candies or chocolate-covered pretzels.
- Hot Beverage Pairing: Serve your meringue cookies with warm beverages such as hot chocolate or apple cider for a cozy touch.
- Cookie Stacking: Create a tower by stacking several meringue cookies, secured with a toothpick, to make an eye-catching centerpiece.
- Themed Plates: Use plates featuring Halloween designs to enhance the festive spirit while serving these whimsical cookies.
How to Perfect Ghost-Shaped Meringue Cookies
Achieving the perfect texture and appearance for your Ghost-Shaped Meringue Cookies requires attention to detail. Follow these tips to ensure success.
- Bold Egg Whites: Ensure egg whites are at room temperature for better volume and stability during whipping.
- Slow Sugar Addition: Gradually add sugar while beating; this helps achieve that glossy finish and stable peaks.
- Thorough Mixing: Beat until the meringue is smooth—this eliminates graininess, ensuring a pleasant mouthfeel.
- Proper Piping Technique: Use a piping bag fitted with a round tip for creating even ghost shapes; practice on parchment paper first if needed.
- Low and Slow Baking: Bake at low temperatures; this prevents browning and keeps the cookies light and airy.
- Cool Completely: Allow meringues to cool thoroughly before decorating; this ensures they hold their shape and texture.
Best Side Dishes for Ghost-Shaped Meringue Cookies
These Ghost-Shaped Meringue Cookies pair wonderfully with various side dishes that complement their sweetness. Consider these options for a complete spooky dessert experience.
- Pumpkin Spice Cupcakes: Moist cupcakes flavored with pumpkin spice create a seasonal favorite that balances the lightness of meringues.
- Chocolate Pudding Cups: Creamy chocolate pudding adds richness, contrasting beautifully with airy meringue cookies.
- Caramel Apples: Crisp apples coated in caramel provide a crunchy texture and fruity flavor that kids will love alongside the cookies.
- Fruit Salad Medley: A mix of seasonal fruits like apples, pears, and grapes adds freshness, enhancing the overall dessert spread.
- Gingerbread Cookies: These spiced treats offer a comforting flavor profile that pairs well with sweet meringues during fall festivities.
- Mini Cheesecakes: Individual cheesecakes topped with fruit preserves or whipped cream make for an indulgent pairing with the lightness of meringues.
Common Mistakes to Avoid
Making Ghost-Shaped Meringue Cookies can be tricky. Here are some common mistakes to watch out for:
-
Bold egg whites: Not beating the egg whites enough can lead to flat cookies. Make sure you whip them until stiff peaks form.
-
Bold sugar addition: Adding sugar too quickly can deflate the meringue. Gradually add sugar while continuing to beat for the best texture.
-
Bold baking temperature: Baking at too high a temperature can cause cracks. Always preheat your oven to 95°C (200°F) for gentle drying.
-
Bold cooling time: Removing cookies too early can result in a chewy texture. Allow them to cool completely on the baking sheet for optimal crunchiness.
-
Bold decoration mishaps: Using the wrong type of marker can ruin your ghosts. Ensure you use black edible markers for decorating without any issues.
Storage & Reheating Instructions
Refrigerator Storage
- Store in an airtight container.
- The cookies will last up to 1 week in the refrigerator, maintaining their texture.
Freezing Ghost-Shaped Meringue Cookies
- Place cookies in a single layer on a baking sheet and freeze until solid.
- Transfer to a freezer-safe container or bag; they can be frozen for up to 3 months.
Reheating Ghost-Shaped Meringue Cookies
-
Bold oven: Preheat the oven to 90°C (194°F). Place cookies on a baking sheet for about 10-15 minutes to refresh them.
-
Bold microwave: Use microwave-safe plates and heat cookies in short intervals of 5 seconds; this is not recommended as it may change their texture.
-
Bold stovetop: Not recommended as it could lead to uneven heating and spoil their delicate nature.
Frequently Asked Questions
Here are some common questions about making Ghost-Shaped Meringue Cookies:
How do I achieve stiff peaks in meringue?
To achieve stiff peaks, beat the egg whites until they stand up straight when you lift the whisk. This ensures stability in your meringue cookies.
Can I use other flavors besides vanilla?
Absolutely! You can experiment with almond extract or lemon zest for unique flavors that complement the sweetness of your Ghost-Shaped Meringue Cookies.
What if my meringues are sticky?
Sticky meringues often mean they were not dried sufficiently. Ensure they bake long enough and cool completely before storing.
How do I decorate my Ghost-Shaped Meringue Cookies?
Use a black edible marker to draw faces on cooled meringues. Get creative with different expressions for each ghost!
Final Thoughts
Ghost-Shaped Meringue Cookies are not just delightful treats; they’re also versatile enough for various occasions. Feel free to customize them with different colors or flavors based on your preference. This spooky dessert is sure to impress at any gathering, so don’t hesitate to give it a try!
Ghost-Shaped Meringue Cookies
Ghost-Shaped Meringue Cookies are a delightful and whimsical treat that will bring a spooky spirit to your gatherings. These light and airy cookies are perfect for Halloween parties, school events, or any fun baking day with friends and family. With their charming ghostly shapes and sweet flavors, they are sure to be a hit with both kids and adults alike. This easy recipe calls for just a few pantry staples, making it accessible for bakers of all skill levels. Enjoy the process of piping these cute meringues and watch as they transform into playful ghosts that will leave everyone smiling!
- Prep Time: 15 minutes
- Cook Time: 90–120 minutes
- Total Time: 0 hours
- Yield: Approximately 20 cookies 1x
- Category: Dessert
- Method: Baking
- Cuisine: American
Ingredients
- 3 medium egg whites
- 170 g (¾ cup) sugar
- 1 teaspoon vanilla extract or 1 packet vanilla sugar
- ½ teaspoon vinegar or a squeeze of lemon juice
Instructions
- Preheat the oven to 95°C (200°F).
- Beat the egg whites in a mixing bowl until stiff peaks form (about 5-7 minutes).
- Gradually add sugar while continuing to beat until fully incorporated.
- Mix in vanilla extract and vinegar (or lemon juice).
- Beat until meringue is glossy and smooth.
- Pipe small ghost shapes on parchment-lined baking sheets.
- Bake for 90–120 minutes until dry and easily lift off parchment.
- Cool completely before decorating with a black edible marker.
Nutrition
- Serving Size: 1 serving
- Calories: 39
- Sugar: 9g
- Sodium: 0mg
- Fat: 0g
- Saturated Fat: 0g
- Unsaturated Fat: 0g
- Trans Fat: 0g
- Carbohydrates: 9g
- Fiber: 0g
- Protein: 1g
- Cholesterol: 0mg